
How to Install WordPress using Softaculous
WordPress has developed into the most popular open source content management system on the market, with now over 25% of the entire internet using this popular platform.
In this guide, we will walk you through the process of installing WordPress step by step with the help of the Softaculous app:
Login to cPanel
This can be done via the direct URL login option, or via the Client Area.
The direct URL login
https://server.webhostnameservers.com:2083/ (for the UK server)
Or
https://server.myfastwebhosting.com:2083/ (for the US server)
Then simply use your login details found in your ‘New Account Information' email
Alternatively you can login via the Client area:
Click Services --> Click your hosting service ---> Login to cPanel (under ‘Actions Menu’)
Once logged into cPanel:

Scroll down to the ‘Software’ tab ---> click ‘Softaculous Apps Installer’
On the next Screen hover over the WordPress logo ----> Select ‘Install’ from the 3 options available.
Now you are on the WordPress Installation Screen. From here the main options to configure are:
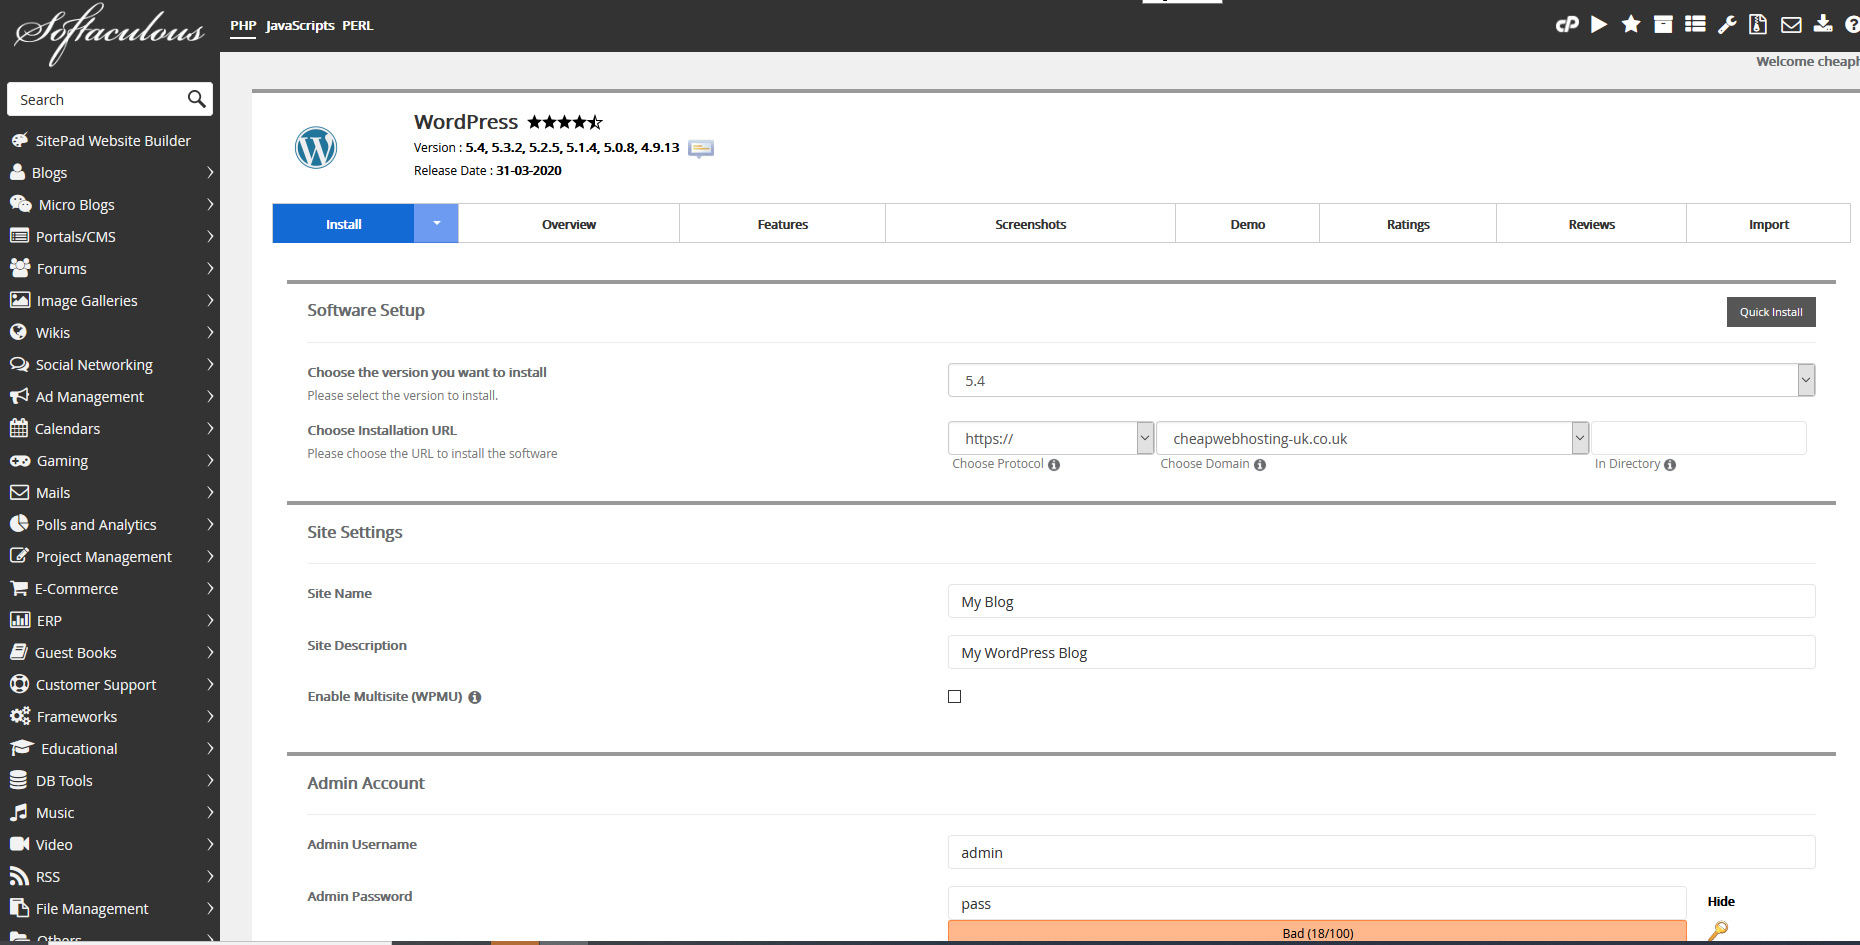
Under ‘Software Setup’ --> ‘Choose Installation URL’
Here you can select whether you want http:// or https:// (Non SSL or SSL), and also whether you want non www. Or www.
Under ‘Site Settings’ you can add both your site name and description - although this can easily be done from within the WordPress dashboard.
Next an important step is to use both a different ‘admin username’ and ‘password’ to the default that is given.
Good security is paramount when using WordPress, so we recommend using a very strong password. You can do this by selecting the key icon to generate a random password to the right of the ‘password’ text box.
Then under ‘Select Plugins’, You can choose from 'Classic Editor' and 'Loginizer'. We recommend installing 'Classic Editor' so that you don’t have any conflicts with the new WordPress version and certain themes.
As regards ‘Loginizer’, we recommend that you install ‘Limit Login Attempts Reloaded’ as a better alternative once you are all set up and logged in to the dashboard (see recommended plugins below).
Finally at the very bottom of the page there is an option to email the installation details to your email for safe keeping. This again is something we recommend to keep all your details safe.
After this simply click ‘Install’ and that's it all done! You have now installed WordPress!
Recommended WordPress Plugins
Once you have logged into the WordPress dashboard, there are 2 additional plugins that we recommend for the most basic security requirements to give your installation some level of protection:
From your WordPress dashboard:
Plugins --> Add New --> In the search box simply type ’Limit Login Attempts Reloaded’ for the first plugin and ‘WPS Hide Login’ for the second. Then ‘Install Now’ followed by ‘Activate’ and that's it all done!
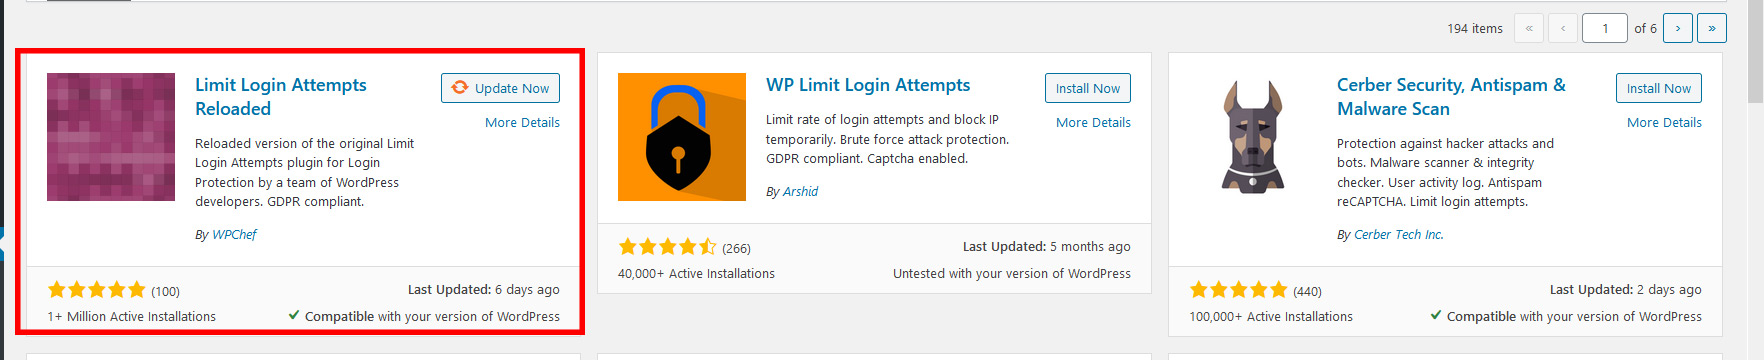
Limit Login Attempts Reloaded - This plugin offers an efficient way to block brute force login attempts. You can easily limit the amount of attempts to a specified number, and also the specify the lockout time. It also gives you the option to blacklist and whitelist certain IP’s and usernames. This is both a FREE and lightweight plugin.

WPS Hide Login - Its a good idea to use a different login URL to the standard /wp-admin. This again adds another vital layer of security to your WordPress installation. Again this is a free and lightweight plugin.